How to hem a product manually. How to shorten the dress
- We hem a dress from jersey
- How to make overlay invisible
- How to hem a chiffon dress
- Seam "American"
- Edging with kosobik
- How to align the bottom?
- Hem-free processing
- Edging with hem
- How to align the bottom?
- Hem-free processing
- Edging with hem
Dress - the favorite dress of many fashionistas. If you purchased the outfit you like, but its length does not suit you, you can shorten it. In this article we will tell how to hem a dress from different materials.
We hem a dress from jersey
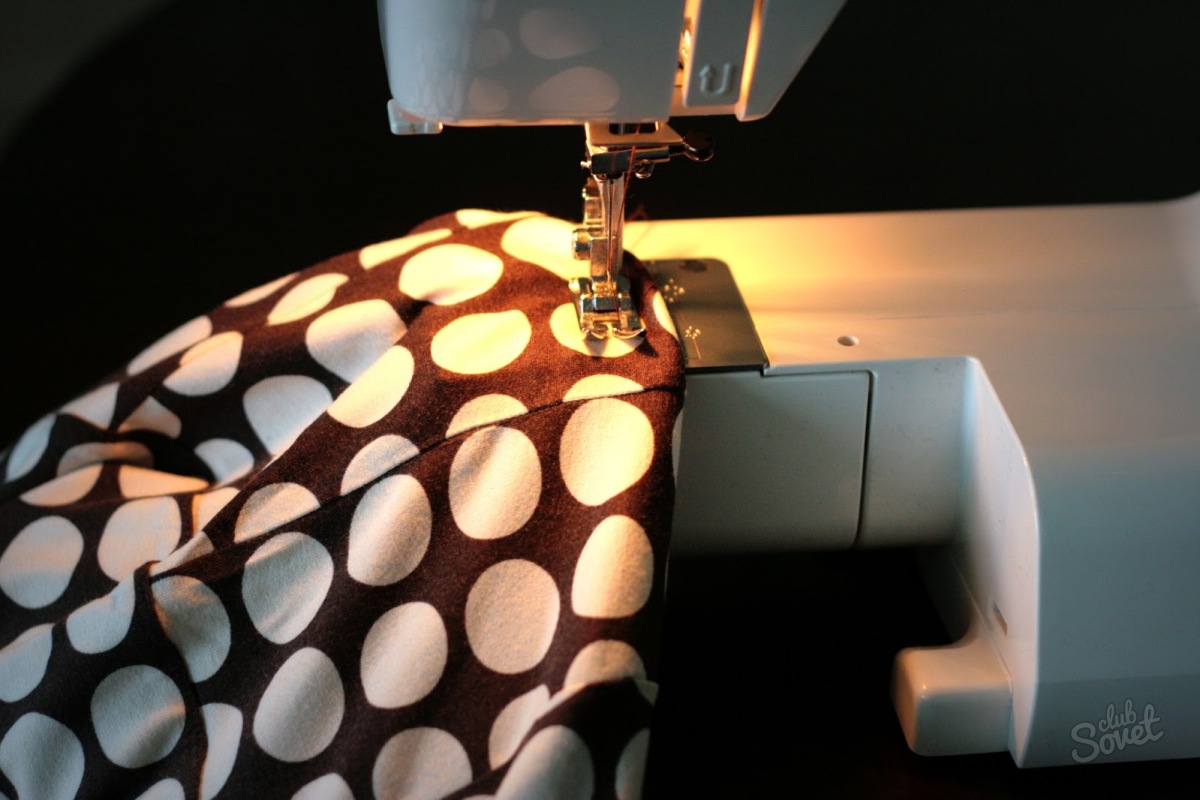
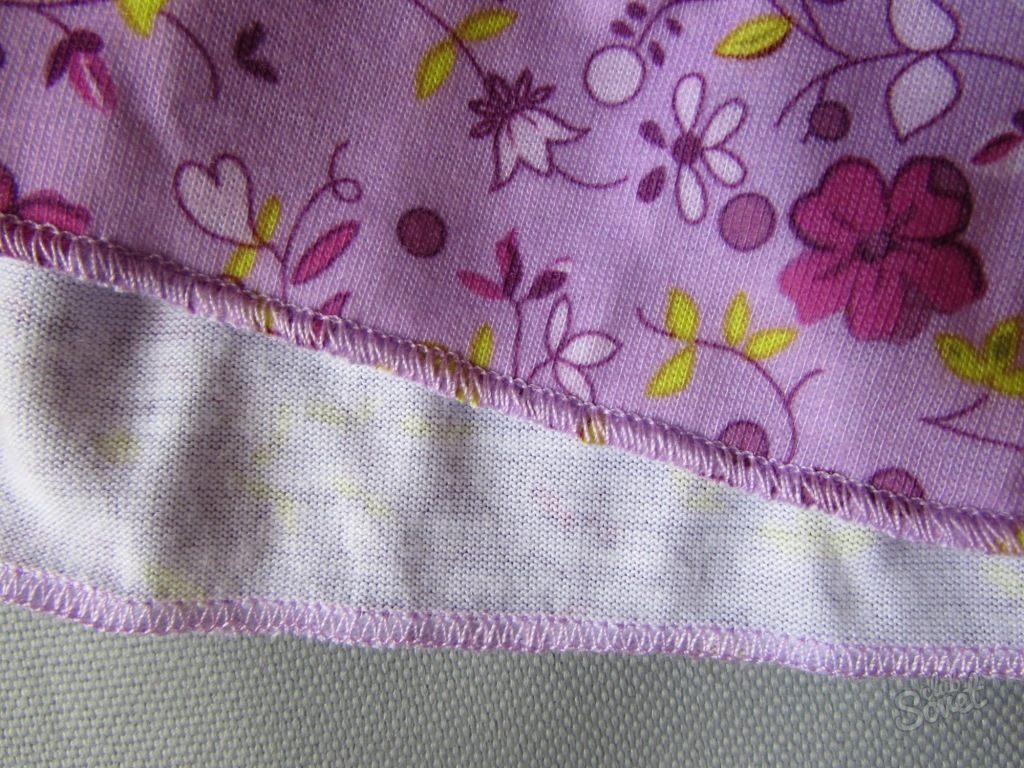
Such a fabric is considered the most difficult, as it is impossible to cover it with a classic stitch. After all, when you re-stretch the thread just break. In order to shorten the outfit, you need a special flat-seam machine. She handles the product with a double seam. If you look from the seamy side, you will see a thick thick line of matted threads. On the front side there are two neat lines. Of course, not everybody has such a machine. Therefore, you can roll up the dress on a regular sewing machine with parallel lines.
How to make overlay invisible
This can be done in two ways:
- manually;
- with a thin fabric lining.
The first method is suitable if the outfit is sewn from a dense costume fabric. The thickness of the cloth allows you to lay the thread between the fibers of matter. To make no visible puncture marks, you need a thin and short needle, as well as a dense line of small thickness. You need to process the cut with an overlock and bend the edge by 5 mm. After that, using an oblique seam, grab the cut and the fabric 1 cm above it. Try to thread the needle between the fibers so that the puncture point is not visible. After the entire edge has been processed, iron out the product.
How to hem a chiffon dress
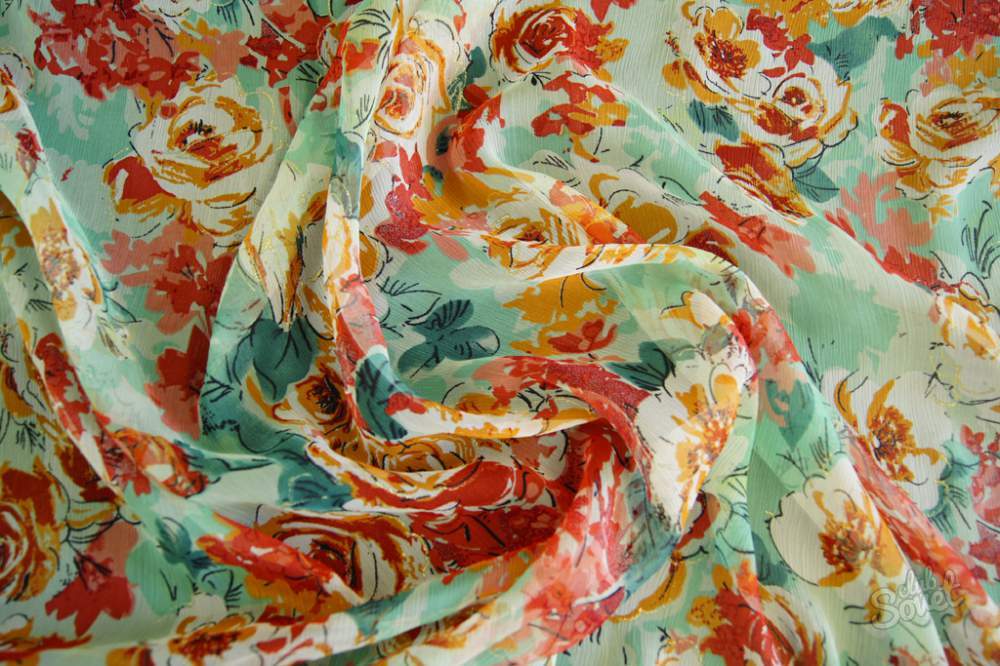
For this you need a thin lining. This may be soft knitwear or organza. Make a pattern that should resemble the bottom of the product. Sew together the bottom of the dress and the lining. Remove the seam and undo it. Now sew the upper part of the lining to the seam at the waist. It is necessary that the length of the lining was a few millimeters longer than the length of the dress. So the product will not "pull".
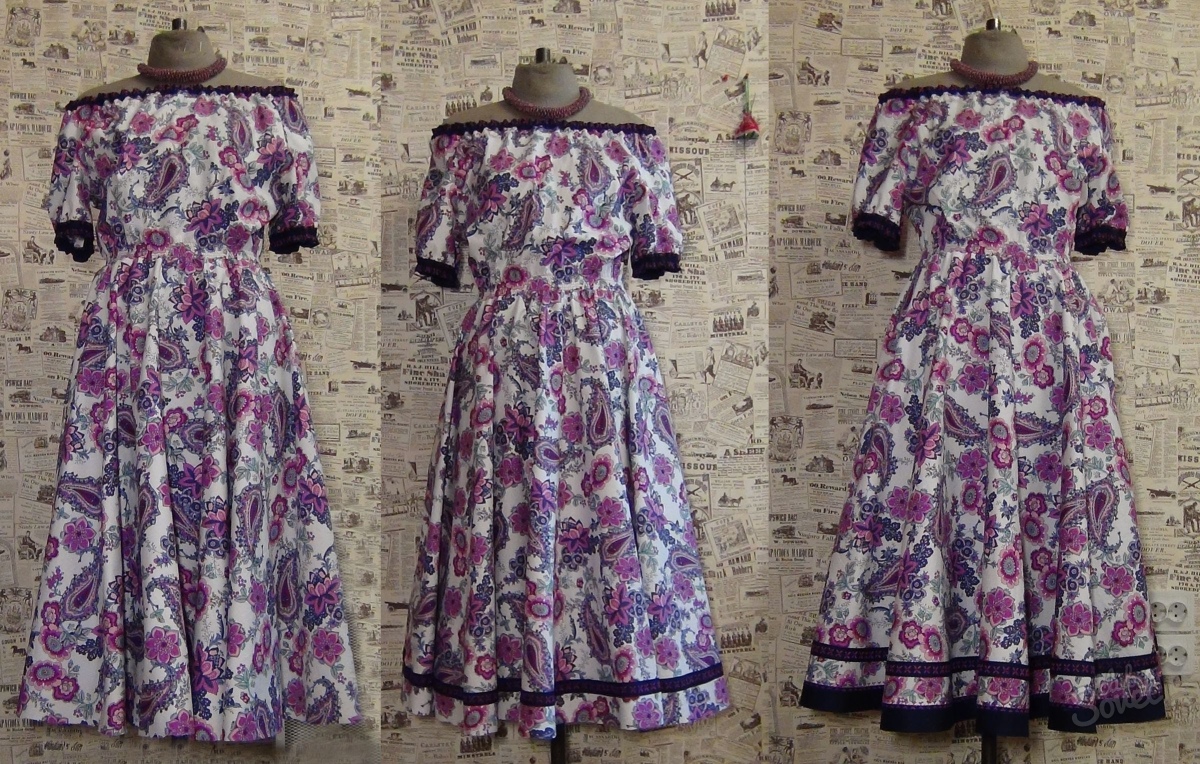
Clothes from a very thin fabric, you can simply handle the overlock. After you get rid of the crumbled threads, you do not need to hem anything. The more often the seam, the more reliable obtomka. In this way, treated fabrics that pour. This is usually done in casual clothes or maxi dresses.
Seam "American"
This method of dressing is used if the outfit is made of translucent fabric. You need with help thumb Roll up the bottom of the outfit into a small diameter roller. You should have something like a tube. Now pierce the fabric from the front to a width of 1-2 threads. The whole tube should be covered by the thread. After work, iron the cut point.
Edging with kosobik
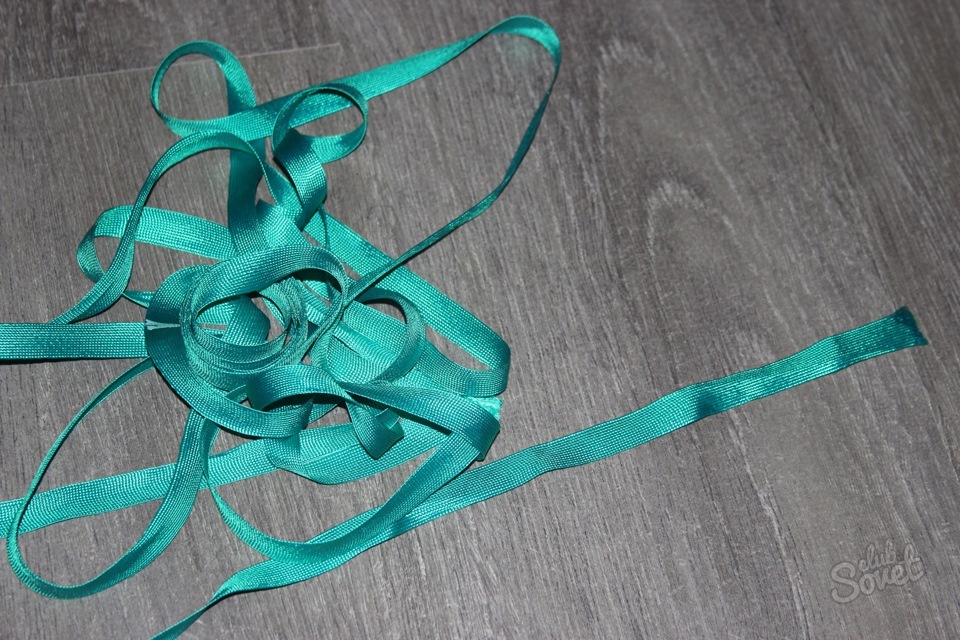
To decorate the bottom of the product, use a special braid. This method is ideal for processing the cut-off area of costume and single-colored fabrics. You need to sew one edge of the crotch from the seamy side. And pin the ribbon from the front edge with pins. Sew through the backing, retreating 1 mm from the edge.
If your dress is very expensive, and you do not get along with the needle and thread, contact an atelier. There for a little money they will suit a dress made of any fabric.
Filing bottom refers to those operations that have to face even those who do not like to sew. Of course, tailoring curtains or fitting pants in height can be entrusted to professionals, but almost every woman had to deal with the problem of a hem fit or with the need to shorten too long a skirt. It is not difficult to do this, and perhaps, having mastered these simple operations, you will love to sew yourself.
How to align the bottom?
When it comes to sewing curtains, most often the line filing is smooth. If we are talking about a skirt, especially flared, then the bottom line is aligned directly on the figure, while the belt and clasp should be well fitted.
To carry out this operation, they become on a flat surface in the shoe with which this item is supposed to be worn. In this case, the assistant, using a vertical wooden ruler, one end of which is placed on the floor, marks with chalk the corresponding level along the entire circumference of the hem.
However, this operation can be done independently, if in the doorway you fix at the desired height a rope, thickly rubbed with chalk (Fig. 1). To the marked line, you need to add allowance for hem and seams, the width of which will depend on the method of processing the bottom.
How to independently mark the line of bending the skirt
Hem-free processing
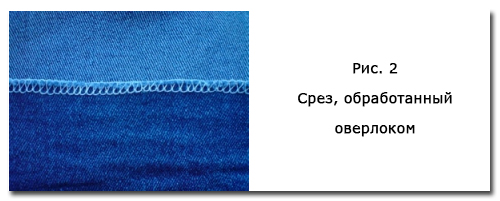
The most in a simple way , which does not require the use of special techniques, is processing the edge of the overlock. In some cases, such a line, for example, made with a contrast thread, looks very attractive (Fig. 2).
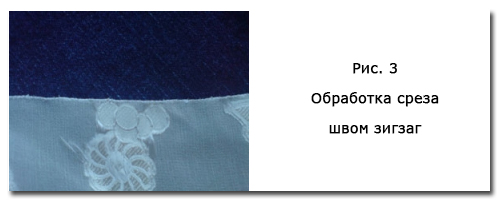
Treatment of the cut with a zigzag stitch or roller overlock, at which a neat scar is formed, is well suited for fine fabrics (Fig. 3). After processing, the protruding threads of the fabric must be trimmed. An even more beautiful stitch is obtained if the zigzag line is laid at some distance from the edge, and then carefully cut off the excess material.
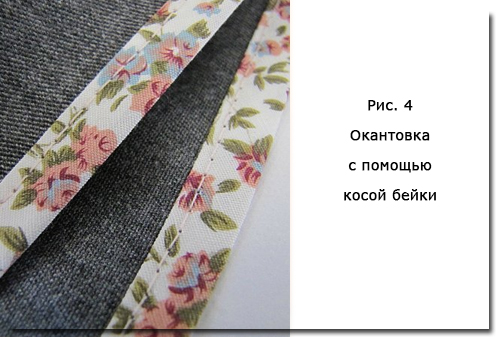
Beautiful and neat filing is obtained when using an oblique bei. For thin tissue, it is attached in the form of a border. To do this, the slanting inlay (it is better to take the finished one) is folded in half and ironed, then the edge of the fabric is inserted into it and stretched (Fig. 4). The same method is well suited for the treatment of internal seams of bulk material.
To hem in such a way a dense material, you need to bend about 0.5 cm. The fabric and the tape are folded with the front sides and stitched along the bottom edge. Then the back is folded down to the wrong side, ironed and stitched along its upper edge (Fig.5). This method of filing is well suited when the length of the skirt is not sufficient for standard bending. 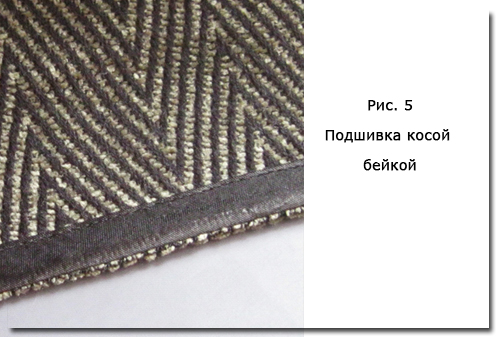
Edging with hem
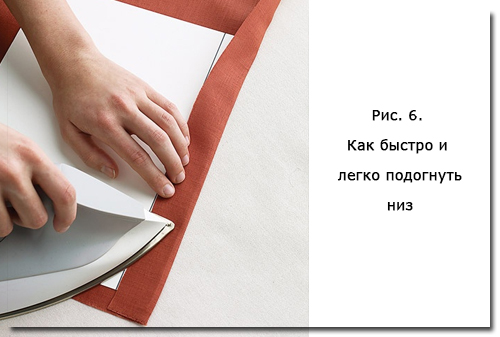
The standard width of the fold of the skirt is 3-4 cm, for thin fabrics, this value may be less. To make a neat hem line with straight cut, it is convenient to use a sheet of paper with a horizontal line drawn at the right distance. Bend the edge of the hem for this distance and iron it with an iron - you will get a perfectly flat line, besides, the hem will not be printed on the front side (Fig. 6).
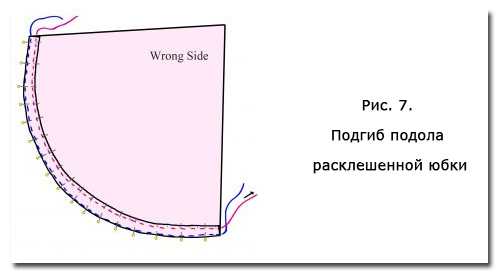
In flared lines, folding is much more difficult. To facilitate this operation, two parallel lines are laid on the bottom of the product (Fig. 7). Then the lower stitching is slightly folded, the fabric is folded inside out along the line of the upper stitch, pierced with pins and smoothed out.
The simplest method of processing a folded edge, which even those who cannot sew can quickly cope with, is the use of adhesive tape. It is put into the fold and treated with a hot iron (Fig. 8). For heavy textiles, two such tapes are recommended. 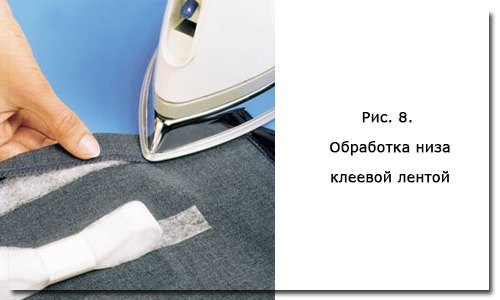
Professional dressmakers do not recommend using this method of fixing the hem, considering that it makes the fabric more rigid. In addition, the adhesive tape after washing, most likely, will have to be glued again. At the time of our grandmothers, traditional stitches — secret (Fig.9) and goat (Fig.10) were used for costume and coat fabric, which until now have been performed in expensive studios. 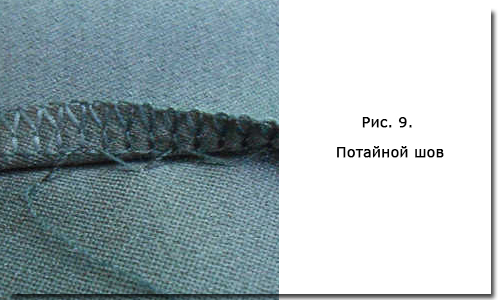
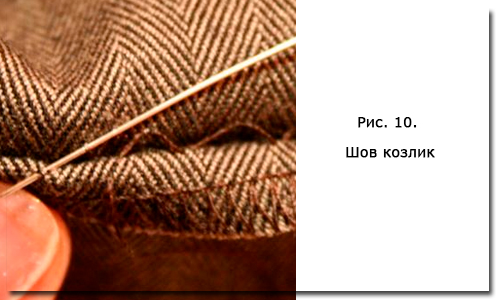
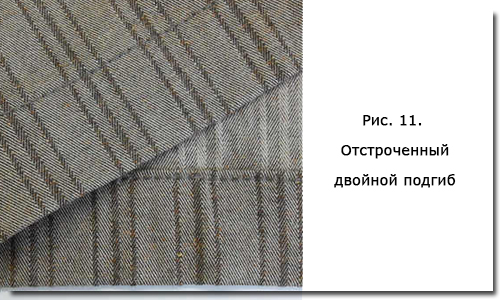
Beautiful execution of such filing requires skill and considerable time. In the professional manufacture of clothing, this operation is most often performed by invisible machine stitching. A simpler solution is a simple grab on a double folded edge (fig.11), which is well suited for sportswear.
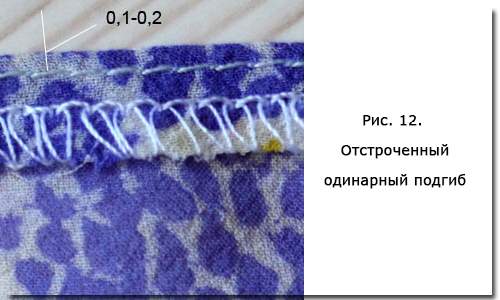
With a narrow hem, such a line can be made with the help of a special heel. For a thin fabric, as well as for flared models, a more suitable option is to treat the edge with an overlock, and then its stitching is 0.2 cm above the ironed fold line (Fig. 12). To prevent the top edge from hanging down, you can make two parallel lines with a wide hem.
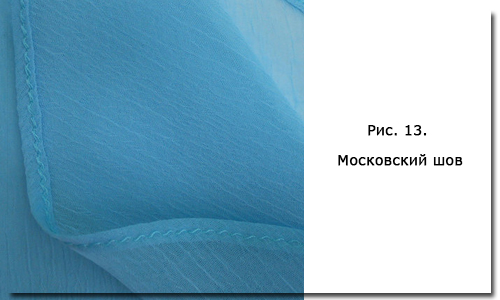
One of the most beautiful, albeit complex ways of filing thin materials is the so-called Moscow seam. Its width is about 3 mm, while on the seamy side there are 2 lines, and on the front side - one. They are performed in the following sequence (Fig. 13):
- Leaving a 1 cm seam allowance when cutting, make a hemming of not more than 4 mm, iron and stitch the fold as close as possible to the edge.
- Carefully cut the fabric from edge to line, leaving more than 1 mm.
- Once again turn away the hem on the wrong side so that the line is approximately in the middle, and iron it.
- Spread hem from the inside out as close as possible to the first line. Experienced masters make the first stitching with a contrasting thread, and then remove it to get one seam from the face and inside out.
If the dress is too expensive and you do not want to trust someone to shorten the product, you will have to do the work yourself. The binding options will depend on the fabric from which the product is sewn.
Knitted fabric is considered to be a difficult material in processing, therefore knitted dress you can not just sweep the classic stitch. To shorten the dress, you will need a flat-panel machine, processing the hem of the dress with a double seam.
But not everyone has such a machine, so you can use parallel stitching lines on a sewing machine to shorten a knit.
For products from thin and flowing fabrics, you can use the invisible hemming method. Such a seam requires additional time and materials, gives some thickening to the hem, but is well hidden.
To hem the hem with this method, you need to take the lining (organza or soft knitted fabric), make a pattern that resembles the bottom of a dress, sew the bottom of the dress and the lining pattern together, twist the seam and iron out. Next, sew the top of the lining to the seam on the belt of the product.
It is important to make the lining longer than the product itself (a couple of millimeters) so that it does not “pull”
But how to hem a dress without a typewriter: when bending products from woolen and costume fabrics, a secret seam is used. On such products punctures will not be noticeable with a needle. Hem this way you need a thin needle in one thread. Work should be done from right to left, with approximately 0.7 cm stitches. The thread should be made below the overlock stitch, then the secret seam will be durable and securely hidden from prying eyes.
Also for products made of thick and woolen fabrics, you can apply the method of processing the hem with a special braid (kosseykoy). It is only necessary to sew one edge of the band from the seamy side, and from the front side, fixing the kosobeyku pins, sew it, stepping back from the edge of 1 mm.
Here such methods can bend the hems of various dresses. And if you are wondering if it is possible to hem a wedding dress, then folk omens do not advise doing it yourself. Moreover, the wedding dress is a very complex product, so it is better to entrust its shortening to professional craftsmen in the atelier.
Filing bottom refers to those operations that have to face even those who do not like to sew. Of course, tailoring curtains or fitting pants in height can be entrusted to professionals, but almost every woman had to deal with the problem of a hem fit or with the need to shorten too long a skirt. It is not difficult to do this, and perhaps, having mastered these simple operations, you will love to sew yourself.
How to align the bottom?
When it comes to sewing curtains, most often the line filing is smooth. If we are talking about a skirt, especially flared, then the bottom line is aligned directly on the figure, while the belt and clasp should be well fitted.
To carry out this operation, they become on a flat surface in the shoe with which this item is supposed to be worn. In this case, the assistant, using a vertical wooden ruler, one end of which is placed on the floor, marks with chalk the corresponding level along the entire circumference of the hem.
However, this operation can be done independently, if in the doorway you fix at the desired height a rope, thickly rubbed with chalk (Fig. 1). To the marked line, you need to add allowance for hem and seams, the width of which will depend on the method of processing the bottom.
How to independently mark the line of bending the skirt
Hem-free processing
The simplest way, which does not require the use of special techniques, is processing the edge of the overlock. In some cases, such a line, for example, made with a contrast thread, looks very attractive (Fig. 2).
Treatment of the cut with a zigzag stitch or roller overlock, at which a neat scar is formed, is well suited for fine fabrics (Fig. 3). After processing, the protruding threads of the fabric must be trimmed. An even more beautiful stitch is obtained if the zigzag line is laid at some distance from the edge, and then carefully cut off the excess material.
Beautiful and neat filing is obtained when using an oblique bei. For thin tissue, it is attached in the form of a border. To do this, the slanting inlay (it is better to take the finished one) is folded in half and ironed, then the edge of the fabric is inserted into it and stretched (Fig. 4). The same method is well suited for the treatment of internal seams of bulk material.
To hem in such a way a dense material, you need to bend about 0.5 cm. The fabric and the tape are folded with the front sides and stitched along the bottom edge. Then the back is folded down to the wrong side, ironed and stitched along its upper edge (Fig.5). This method of filing is well suited when the length of the skirt is not sufficient for standard bending.
Edging with hem
The standard width of the fold of the skirt is 3-4 cm, for thin fabrics, this value may be less. To make a neat hem line with straight cut, it is convenient to use a sheet of paper with a horizontal line drawn at the right distance. Bend the edge of the hem for this distance and iron it with an iron - you will get a perfectly flat line, besides, the hem will not be printed on the front side (Fig. 6).
In flared lines, folding is much more difficult. To facilitate this operation, two parallel lines are laid on the bottom of the product (Fig. 7). Then the lower stitching is slightly folded, the fabric is folded inside out along the line of the upper stitch, pierced with pins and smoothed out.
The simplest method of processing a folded edge, which even those who cannot sew can quickly cope with, is the use of adhesive tape. It is put into the fold and treated with a hot iron (Fig. 8). For heavy textiles, two such tapes are recommended.
Professional dressmakers do not recommend using this method of fixing the hem, considering that it makes the fabric more rigid. In addition, the adhesive tape after washing, most likely, will have to be glued again. At the time of our grandmothers, traditional seams — secret (Fig. 9) and goat (Fig. 10) were used for costume and coat fabric, which until now have been performed in expensive studios.
Beautiful execution of such filing requires skill and considerable time. In the professional manufacture of clothing, this operation is most often performed by invisible machine stitching. A simpler solution is a simple grab on a double folded edge (fig.11), which is well suited for sportswear.
With a narrow hem, such a line can be made with the help of a special heel. For a thin fabric, as well as for flared models, a more suitable option is to treat the edge with an overlock, and then its stitching is 0.2 cm above the ironed fold line (Fig. 12). To prevent the top edge from hanging down, you can make two parallel lines with a wide hem.
One of the most beautiful, albeit complex ways of filing thin materials is the so-called Moscow seam. Its width is about 3 mm, while on the seamy side there are 2 lines, and on the front side - one. They are performed in the following sequence (Fig. 13):
- Leaving a 1 cm seam allowance when cutting, make a hemming of not more than 4 mm, iron and stitch the fold as close as possible to the edge.
- Carefully cut the fabric from edge to line, leaving more than 1 mm.
- Once again turn away the hem on the wrong side so that the line is approximately in the middle, and iron it.
- Spread hem from the inside out as close as possible to the first line. Experienced masters make the first stitching with a contrasting thread, and then remove it to get one seam from the face and inside out.
Consider in detail, a pencil and several other options for processing the bottom.
The first thing to do is to measure the skirt and clarify its final length. On the fitting, make the front mark at the desired height, we will be guided by it.
Fold the skirt so that the side seams are aligned, and the folds are in the middle of the front and back panels of the skirt.
The pencil skirt is narrowed at the sides, therefore, when laid out on the table, its bottom has a curved appearance. This is perfectly normal for a narrowed skirt. The smaller the narrowing, the straighter the bottom line. For straight skirt, it is completely flat.
[ U ] [ OT ] [ ST ] [ OST ] [ TG ] [ GTU ]
id
Other Russian
Ukrainian
Belorussian
Polish
English
Spanish
Deutsch
Turkish
Bulgarian
Czech
Hungarian
Estonian
Armenian
Kazakh
Hebrew
Georgian
Serbian
Croatian
Lithuanian
Slovak
Slovenian
Albanian
Macedonian
Latvian
Kyrgyz
Mongolian
Portuguese
Uzbek
Korean
Romanian
Danish
Greek
Dutch
Norwegian
Swedish
Italian
French
indonesian id arabic
Hindi
Bengal
Chinese
[Azerbaijani
] [bosnian bs ] [tajik
] [Latin
] [Vietnamese
] [Kannada kn ] [Finnish
] [Filipino
] [Irish
] [Icelandic
] [Scottish (Gaelic) gd ] [Japanese
] [Afrikaans
] [Amharic am ] [Catalan
] [ Cebuan ceb ] [Corsican
] [Welsh
] [Esperanto
] [Basque eu ] [Persian
] [Frisian
] [Galician
] [gujarati gu ] [house
] [Hawaiian
] [Hmong hmn ] [Creole (Haiti) ht ] [Igbo ig ] [Javanese
] [Khmer
] [Kurmanji
] [Luxembourg lb ] [Lao
] [Malagasy
] [Maori
] [Malayalam ml ] [Marathi mr ] [Malay
] [Maltese
] [Burmese my ] [Nepali
] [cheva ny ] [punjabi
] [Pashto
] [sindhi sd ] [Sinhala si ] [Samoan
] [shona sn ] [somali
] [sesoto st ] [Sudanese
] [Swahili
] [Tamil
] [Telugu te ] [Thai
] [urdu
] [khosa xh ] [yiddish yi ] [yoruba yo ] [zulu
] [ Tf ]
Notice : unserialize (): Error at offset 392 of 4096 bytes in /home/admin/web/server4.doubleclick.net.ru/public_html/scripts/lib/auto_load/save_data.php on line 120
Notice : Undefined variable: url_text in /home/admin/web/server4.doubleclick.net.ru/public_html/scripts/api/method/TranslateText.php on line 936
No text
Container is damaged! Try to get the article again GetTextFromUrl.php , but this will delete all existing translations !!!
How to align the bottom?